
The private-sale checklist
How to sell an Airstream by owner
To sell an Airstream by owner, document what you have, set an asking price, photograph its condition, and publish an accurate listing. Then arrange buyer inspections and complete payment and ownership transfer directly with the buyer.
1. Confirm the exact Airstream
Start with the model year, model, and floor plan, not just a familiar name such as Bambi or Flying Cloud. Record the length and the actual sleeping arrangement. For a touring coach, add the chassis, engine, and current mileage.
Compare your paperwork and identification plate with the Airstream itself. Use the appropriate year in Airstream's owner manuals and parts books when checking factory equipment. A current model's specifications may not describe an older unit, and later renovations can change what is installed.
Separate factory specifications from upgrades you or a previous owner added. If a capacity, weight, or installation date is unknown, say so instead of borrowing a number from another ad.
2. Gather records and condition details
Build a small sale folder before inquiries arrive. You do not need to claim a complete service history when you do not have one. A clear account of what you know, what is documented, and what still needs attention is more useful.
Seller preparation checklist
- Ownership: locate your title or ownership documents and establish whether a lender is involved.
- Service: collect available receipts and dates for work such as tires, brakes, bearings, seals, appliances, or chassis maintenance.
- Condition: note known leaks, water damage, dents, corrosion, repairs, and equipment that does not work.
- Changes: list renovations and upgrades, including who installed them and any supporting paperwork you have.
- Included items: identify which hitch equipment, cords, hoses, accessories, and furnishings are part of the sale.
- Viewing access: decide where buyers can see it and which systems can be demonstrated safely.
Clean and organize the trailer without concealing wear or damage. Have a qualified technician assess problems you cannot evaluate yourself. Keep IDs, signatures, account numbers, and unredacted ownership documents out of public listing photos.
3. Choose an asking price
Start with several current Airstream listings close to your year, model, floor plan, and condition. Note the location, included equipment, seller type, and date you checked each one. A renovated older trailer and an original one may appeal to different buyers even when their model names match.
An asking price is not a confirmed sale price. A sold listing's last advertised price also does not reveal the final negotiated amount. Do not assume that every dollar spent on upgrades adds a dollar to resale value.
Choose an initial asking price you can explain with those comparisons, and decide privately what terms you would accept. Revisit your comparisons as inventory changes. A lack of inquiries alone does not tell you whether price, photos, location, condition, or exposure is the limiting factor.
4. Take a useful set of photos
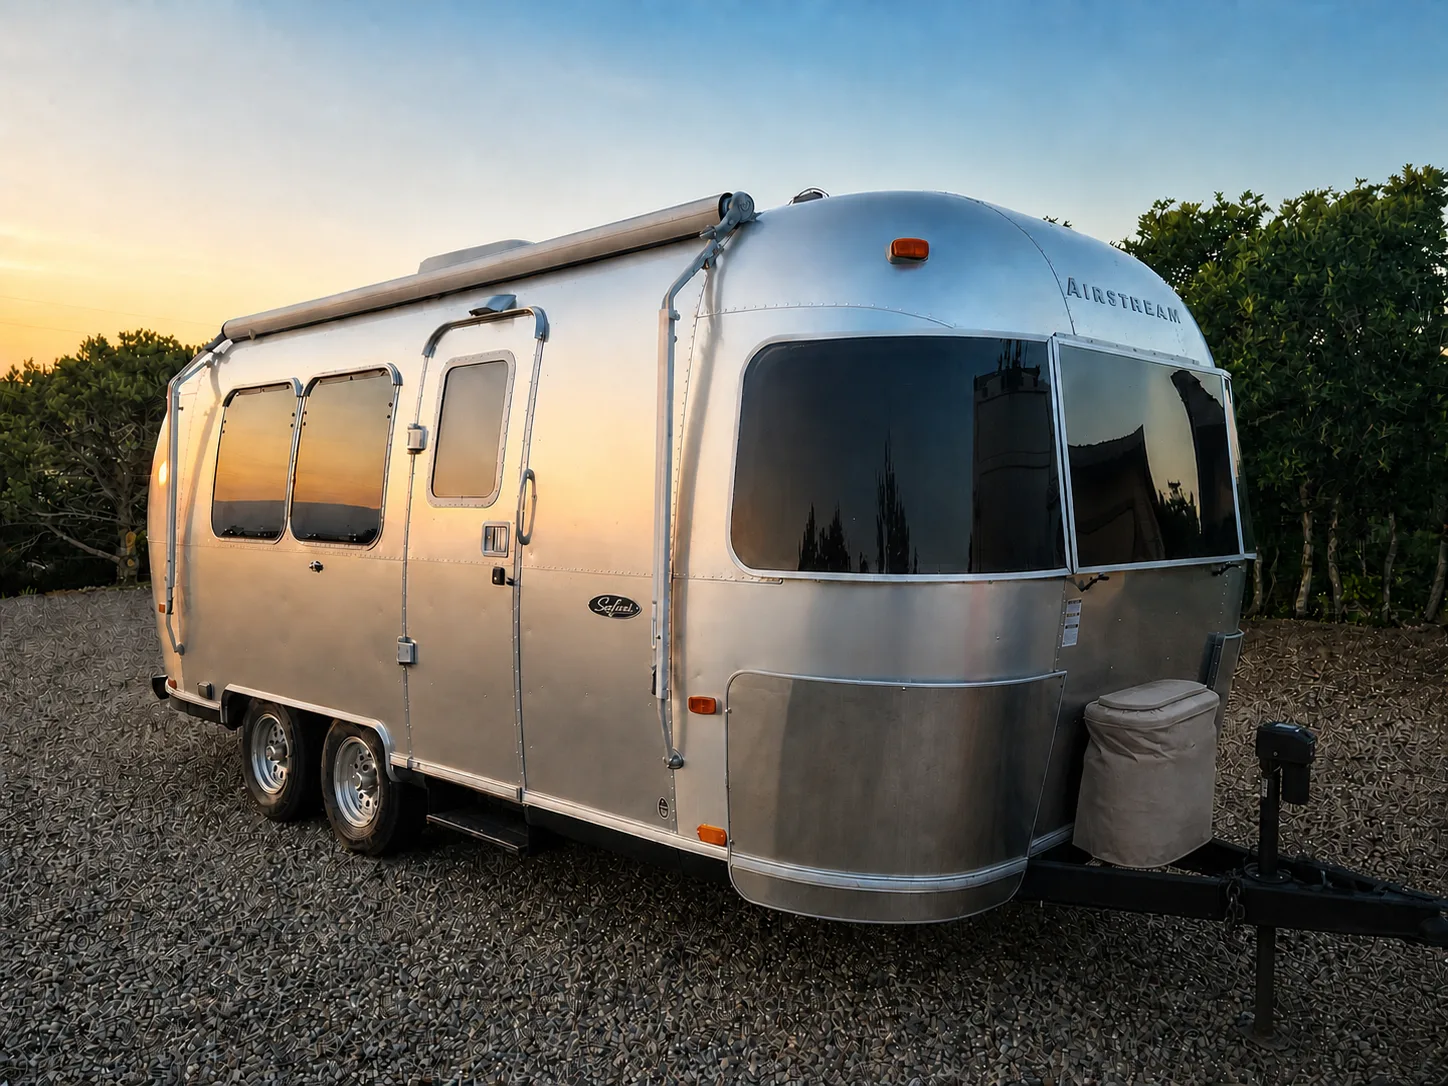
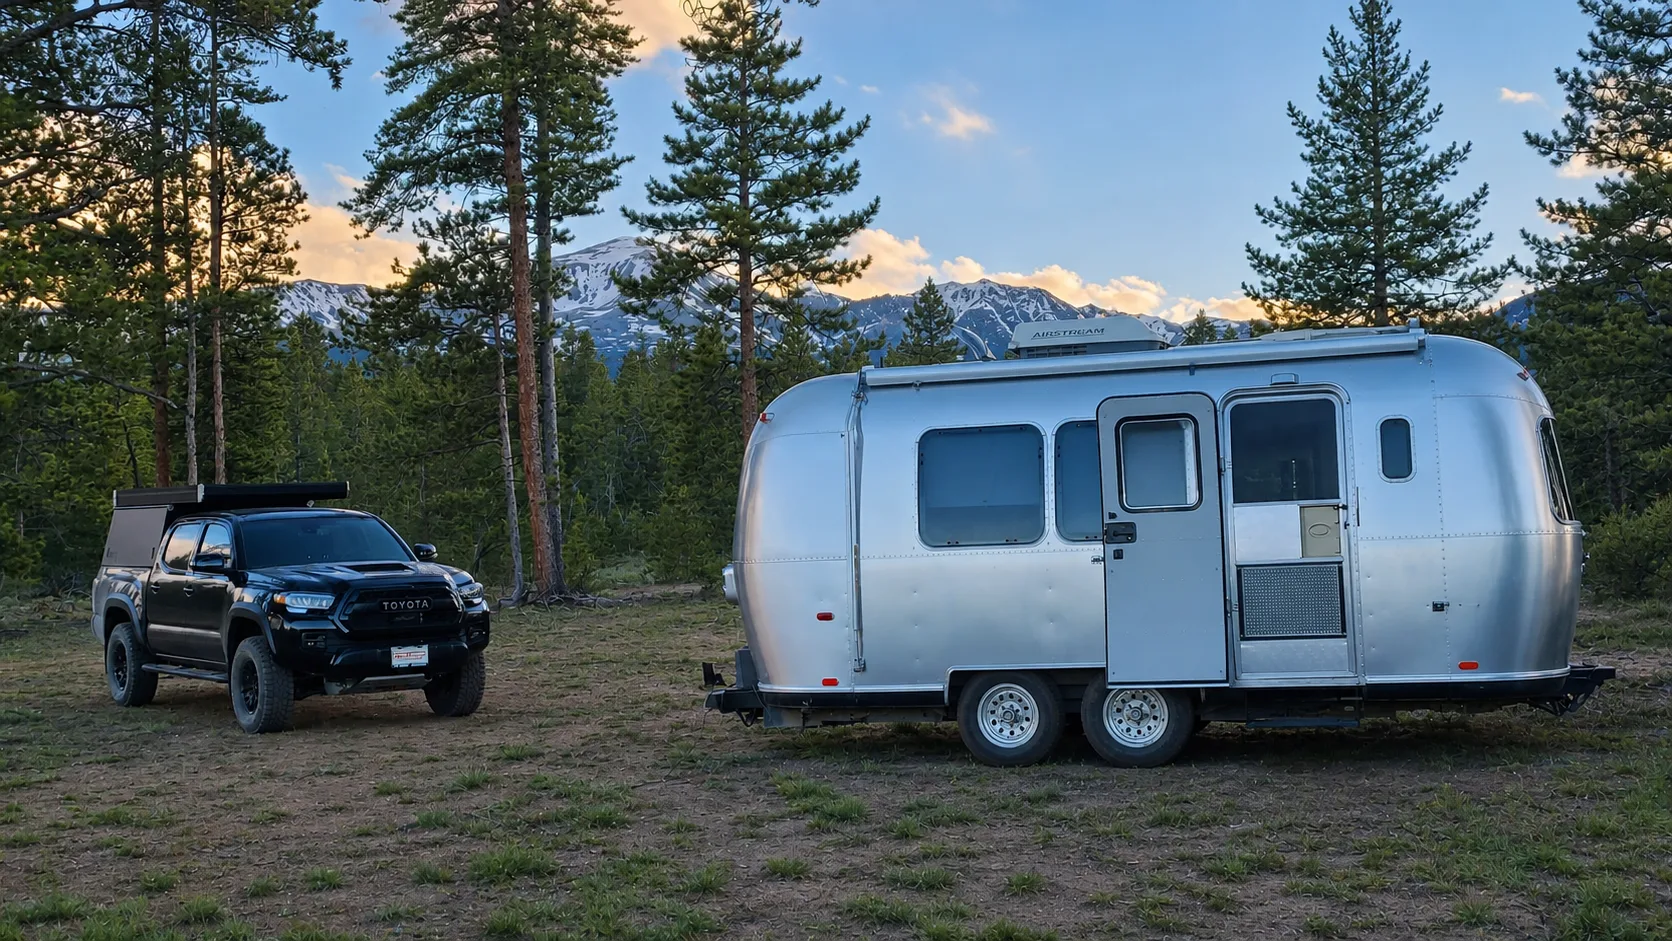
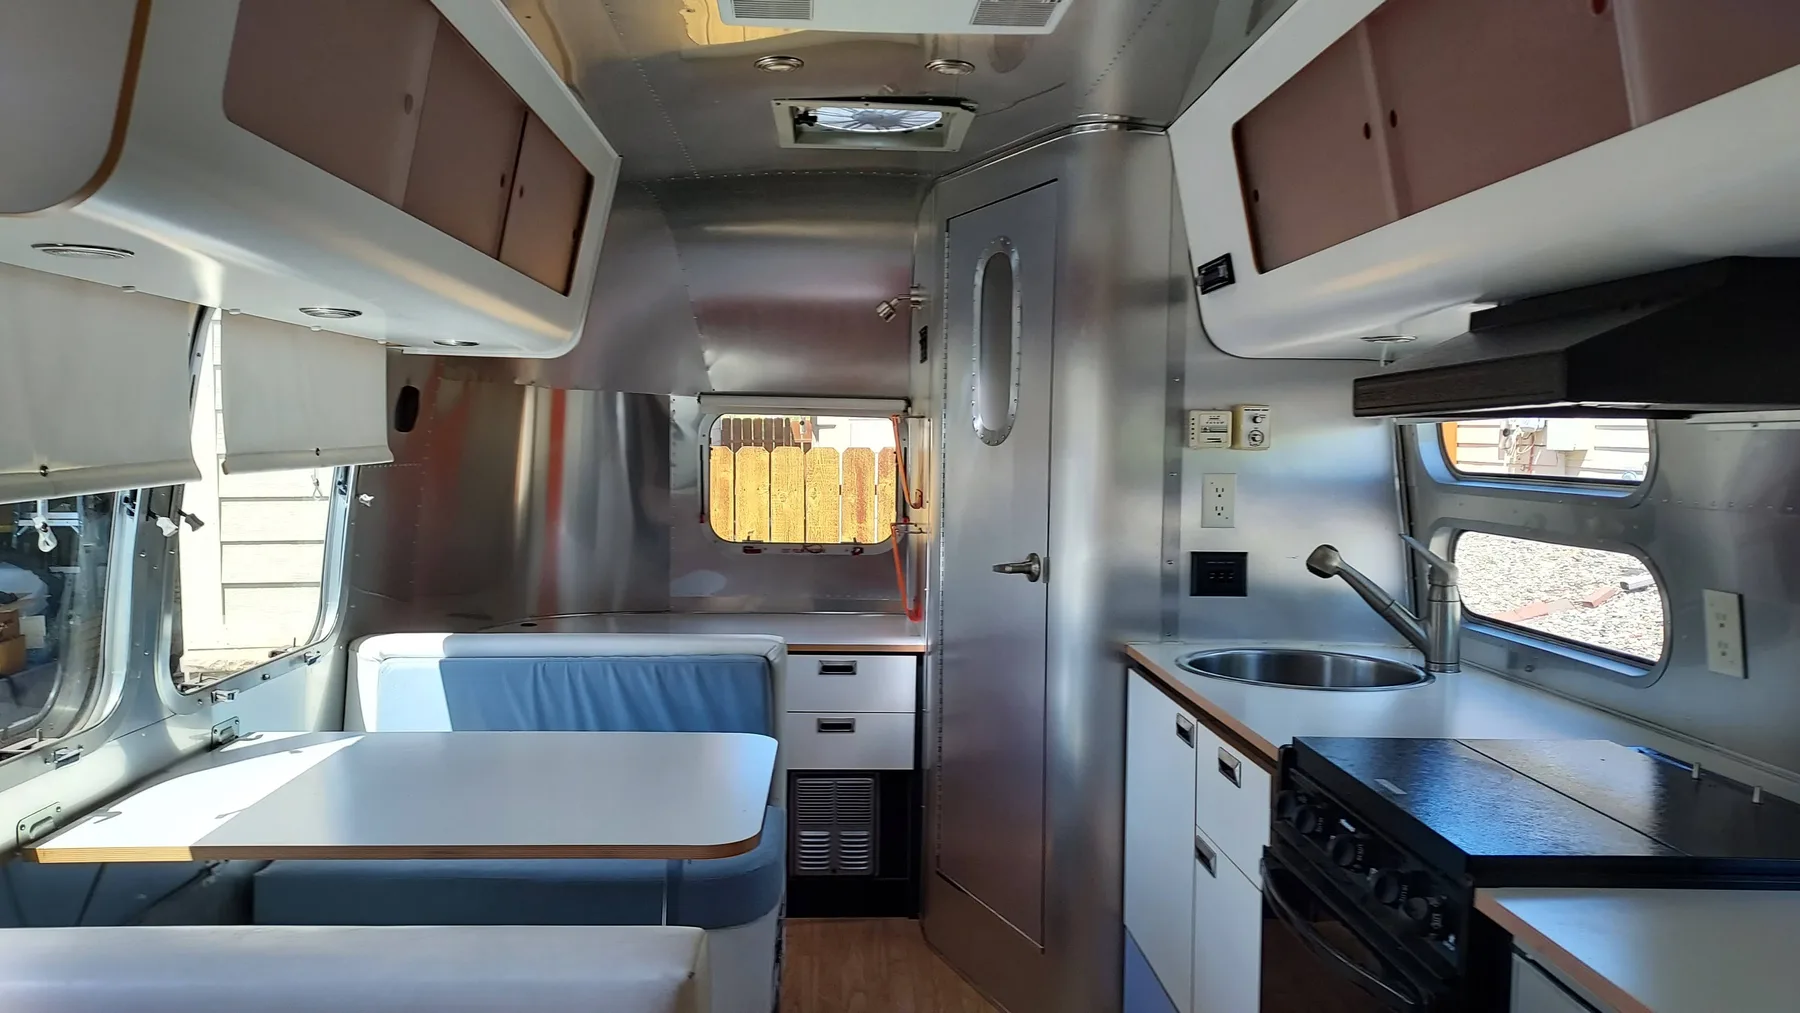
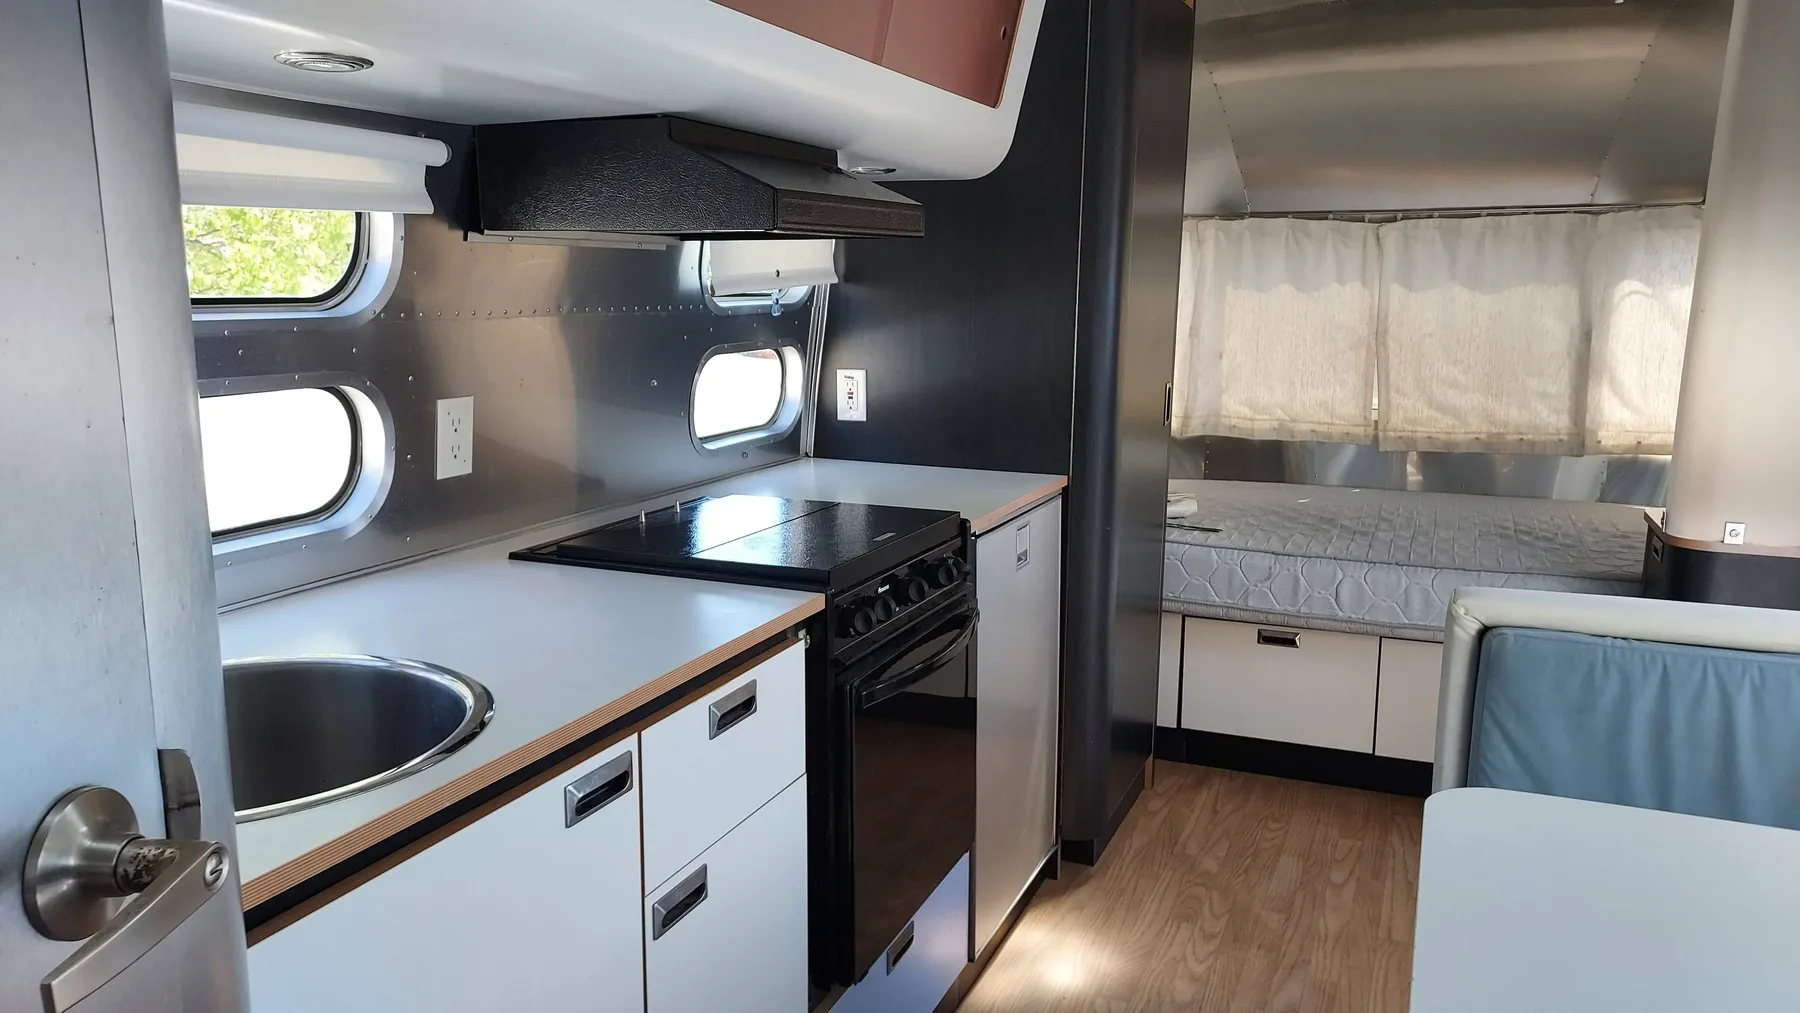
Photograph the actual Airstream as it is now. Start with a clear overall view, then move through the exterior, interior, systems, and condition details. Give buyers enough context to understand what a close-up shows.
These four owner-provided photos from our 2003 Safari CCD listing show a useful sequence. They are real photos, not generated scenes, and illustrate framing rather than certify condition or current availability.
Listing photo checklist
- Exterior overview: front, rear, both sides, and a three-quarter view with the trailer in frame.
- Layout: interior views looking toward both ends, showing the path through the trailer.
- Living spaces: the bed arrangement, dinette, seating, kitchen, bathroom, and storage.
- Equipment: accessible battery, solar-control, utility, and appliance details that support your description.
- Condition: close-ups of known damage and repairs, plus a wider photo locating each area.
- What stays: accessories included in the asking price. Do not imply a tow vehicle or personal gear is included unless it is.
Use natural light where practical, keep the camera level, and check that images are sharp before uploading. Avoid filters that change the apparent condition. Do not climb onto a roof or open unsafe equipment just to get a photograph.
5. Write and publish your listing
Still choosing where to advertise? Compare places to sell your Airstream and the Airstream Buy Sell and Airstream Marketplace packages before committing.
Lead with the exact identity, asking price, and city and state. Follow with the layout, equipment, condition, and reason for selling. Specific details are more useful than repeating phrases such as "like new" or "must see."
- Opening
- Year, Airstream model, floor plan, asking price, and location.
- What a buyer gets
- Sleeping arrangement, installed equipment, documented upgrades, and included accessories.
- Condition and history
- Known issues, repairs, available service records, title status, and gaps in your knowledge.
- Practical next steps
- Current availability, viewing arrangements, and how to ask for additional details.
For example, "solar installed in 2024; receipt available" tells a buyer more than "fully off-grid." Only use the specific claim when you can support it. Explain capabilities and limitations without promising how another person's travel setup will perform.
On Airstream Buy Sell, you can create your listing or import your own existing ad. Imports start as private drafts. Review every imported detail, check the current listing fee and inclusions, and submit a complete listing for review. Publication follows approval, not simply uploading photos.
After publication, share your listing link and use the available video, Facebook text, and Marketplace photo kit. Keep the price, included items, and availability consistent wherever you post.
Publication also lets Smart Airstream Alerts check your listing against buyers' saved search criteria. A matching search with alerts enabled can trigger an email on the buyer's immediate, daily, or weekly schedule, without another search. These are new-match alerts, not a general newsletter or a promise that every trailer has a waiting buyer.
6. Manage inquiries and inspections
Answer questions with details, photos, or records rather than guesses. Ask what the buyer still needs to evaluate and whether they want an independent inspection. Agree on a viewing time and location before sharing more personal information than necessary.
Explain which systems can be demonstrated and whether the Airstream has power or water available at the viewing. Do not treat a walkthrough as a substitute for a qualified inspection. For a touring coach, agree on appropriate test-drive arrangements and confirm insurance requirements with your insurer.
Keep a written record of the price, included items, and any agreed conditions. Read our marketplace safety guidance before meeting or accepting money. A verification badge is not an inspection, ownership guarantee, or guarantee of payment.
7. Plan payment and ownership transfer
Plan the paperwork before promising a pickup date. Use the USAGov directory of state motor-vehicle agencies to find the relevant agency, then confirm the requirements for your vehicle and transaction. Ask about title signatures, lien release, any required bill of sale or disclosures, plates, and seller notices. Requirements vary by jurisdiction.
If a loan remains, contact the lienholder through independently verified details and agree on its payoff and title-release process. Discuss the vehicle-payment method with your bank before the meeting, including verification and reversal risks. Do not rely on a buyer's payment screenshot.
The FTC warns that available funds do not prove a check is genuine. A check can appear in your balance before it is discovered to be fake. Do not accept an overpayment and send the difference back or forward money to a supposed shipper.
Airstream Buy Sell's checkout is for the listing fee, not the vehicle purchase. We do not hold the purchase price, provide escrow, or manage the title transfer. For an unusual ownership, estate, lien, or interstate situation, seek guidance from the relevant agency or a qualified professional.
8. Complete the handoff and close your ads
Once you have completed the agreed payment verification and applicable paperwork, hand over the agreed keys, manuals, records, and accessories. Keep copies of the transaction documents and complete any required seller reporting.
Walk through basic controls and point the new owner to the correct manuals. A travel-trailer buyer should confirm the suitability of their tow vehicle, hitch setup, and transport arrangements independently. Remove personal belongings and disconnect your accounts from connected devices.
Mark your Airstream sold and update every other advertisement. If the sale is only pending, describe it as pending rather than completed. Clear availability saves both you and other buyers unnecessary conversations.
Sources and scope
- Airstream owner manuals and parts books: year-specific manufacturer documents.
- USAGov state motor-vehicle services: a directory to the appropriate agencies, not a universal transfer checklist.
- FTC fake-check scam guidance: payment availability and overpayment warning signs.
Written by Airstream Buy Sell, an independent classified-advertising service, not Airstream, Inc. This is general seller preparation guidance, not a vehicle appraisal, inspection, or legal opinion. Official resources were checked on September 28, 2026. Confirm current transaction requirements with the relevant agency, lender, bank, or qualified professional.
All Airstream selling guidesFor Airstream owners
Your next step: a clear, complete listing.
Bring your photos, equipment details, and an honest description of condition. Create a listing or import your own existing ad, then review it before submitting.